
.JPG)
.JPG)
.JPG)
.JPG)
.JPG)
.JPG)
All jewelry shown is available in my Etsy shop
See my new printables at https://www.creativefabrica.com/designer/laura-beth-love/

.jpg)
It seems that spring has finally found us! Yay! As I like to say: Onward! I know some of you have been waiting patiently for promised jewelry-making videos on my YouTube channel and I have just been so wrapped up in getting this new book put together that I just had to put videos aside for the time being. (Not to mention I've been trying to squeeze in some new jewelry for Mother's Day for my Etsy shop too, as that only comes once a year!)
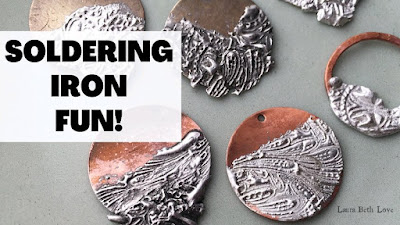
This I say as I am planning on filming today, looking for my list of video "to-do's" that are somewhere on my phone or in a notebook... I'll probably start with a quick review of my last title, Soldering Iron Jewelry, for those who are new, and some soldered dragon's claws and talons as promised a while back, and then introduce the new book.
Here's the thing: I want so much to start the promotion and hype but I just haven't completed all of the photography (and I am picky about my book covers!) so I hate to start gabbing about it all until I have something solid to visually share with you...that said, my newest title, The Broken China Jewelry Book, is almost finished!
All autumn and winter long I worked on putting together 25 fantastic jewelry-making projects - all using old broken china - and for all skill levels. I created projects for the newest beginner to the advanced solderer, and using all different jewelry-making techniques and styles.
I'm so excited to share this beautiful book with you! The projects, step-photos, and writing are all finished, and the beauty photography is in the works. I still have a review or two to do of the hard copies once the photos are added, and then closer to that I'll have a release date for you. If I had to guess I'd say June, so be ready!
Have a great week!
Laura
.jpg)
.jpg)
.jpg)
.jpg)
.jpg)
.jpg) '
'.jpg)


Article and images copyright ©Laura Beth Love 2024 and may not be republished in print or other media without express written permission from the author. As an Amazon Influencer, I earn from qualifying purchases.


.jpg)
.jpg)
.jpg)
.jpg)
.jpg)
.jpg)
.jpg)
.jpg)
.jpg)
.jpg)

